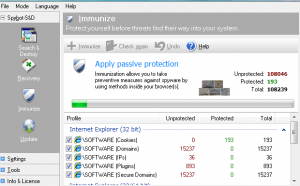
Why is this tool required?
Spyware undetectable by a single security software is beginning to be reported.
This tool has very simple function for preventing a spyware. And it has high compatibility with a security software.
The signal to write this article is that I received a request for cleaning up “Babylon” spyware. The infected PC has already installed the security software called “ESET Smart Security 4.2” with latest virus definition, but it was infected. For cleaning up “Babylon” spyware and doing preventive measures, the tool contributed. About this spyware, I will write other article. This time, I woud like to explain how to install and use the tool.
Compatibility with ESET
According to various web sites’ information, ESET and Spybot Search & Destory (Spybot) are good combo, but Spybot is very slow. As a result of the Office’s inspection, I got that Spybot which revoked some resident options isn’t very slow.” .
Is Spybot slow?
I already stated, I think that the Spybot isn’t slow by the appropriate settings.
If the PC becomes slow by this tool, I think that it is when “SDHelper” and “Tea timer” options were installed.
How to install and use Spybot
Step 1. Software Installation
- Download the following software from http://www.safer-networking.org/jp/index.html
– Spybot – Search & Desktory (On May 8, 2012, latest version: 1.6.2)
– Detection updates [date] - Open the downloaded file named “spybotsd162.exe” and begin to install.

- Select Languages. This time, I selected “English” because for the installion manual.
* You can select other languages in the language menu bar after the tool runs. - The following information is the recommended installation options.
– [Select Components]: Full installationの
– [Select Additional Tasks]: Check off the following tasks
+ User Internet Explorer protection (SD Helper)
+ Use system settings protection (Tea Timer)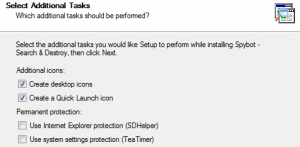
– [Completing the Spybot]: all check on
+ Install Security Center Integration
+ Activate Security Center Integration - After the Spybot runs, Click on “Create registry backup” button and click on “Next” button.
- Skip “Search for updates (Step. 5)” and “Immunize this system (Step. 6)”.
- Click on “Start using the program” button and close Spybot tool.
- Open “spybotsd_includes” file (latest definition) and install it.
*First time, I recommend to manually install latest definition file.

- The installation process is finished, please go next step “Settings”.
Step 2. Settings
After the tool runs, please select “Advanced mode” in “mode” upper menu.
- Click on “Settings” in “Settings” of the left side menu.
- You had better maximize Settings Window. And check the following settings.
Automation
+ Program start
– (Check on) Immunize on program start if program has been updated.
– (Check on) Don’t ask for fixing confirmation.
+ System start
– (Check on) Automatically run program at system startup
+ Web update
– (Check on) Search the web for new versions at each program start
* Only resident PCs. About the mobile laptop, you had better check off.
– (Check on) Use proxy to connect to update server. (Only required the web proxy)
* When you check on it, the detail information will be displayed.
In case of Kyoto University, “Host: proxy.kuins.net, Port: 8080”.
Step 3. Confirmation of Definition Update
- Click on “Spybot-S&D” in the left side menu.
- Click on “Search for Updates” button.
- In case that the network and proxy setting are correct, the download site selection menu will be displayed. There is not Japan in the selection, so you click on “Continue” button without the choice.
- Basically, you should check on all update items. And then, click on “Download”.
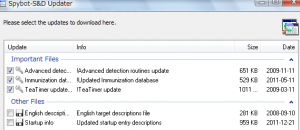
- After the operation is finished, please click on “Exit”. Then, Spybot will be automatically restarted.
Step 4. Immunization setting for web browsers
In case of the appropriate settings (Step 2), when new definition is updated, the immunization will be also updated automatically.
Step 4. How to scan
You should carry out the scan once at least. If you use a free software, a spyware, such as CommonName or OpenCandy, might be installed.
- Click on “Spybot-S&D” in the left side menu.
- Click on “Check for programs” and click on “Yes” button.
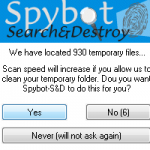
- A scan for web browsers and the OS registory starts as follows.
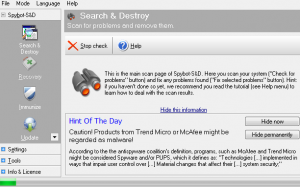
- When the scan finishes, “Fix selected programs” button will be displayed in the navigation bar. Click this button and clean up the detected spyware.
10th May, 2012 Chief of Information Processing Office: Kitani.

